Deploy the XBOW Sentinel Connector
- Enterprise only
- Public preview
Deploy the XBOW data connector to pull results from XBOW Console to your Log Analytics workspace in Microsoft Sentinel. The connector automatically creates and populates tables with pentest findings, assets, and target applications.
Microsoft access required
Ensure you have the required access to install and deploy the data connector:
- Read and write permissions on the Microsoft Sentinel workspace
- Read permissions for the shared keys in the workspace
- Read and write permissions to Azure Functions to create a Function App
Install the solution
You install solutions for Microsoft Sentinel from Microsoft Defender using the Content hub.
-
Go directly to the Content hub for Microsoft Sentinel. Alternatively, in Microsoft Defender go to Microsoft Sentinel > Content management > Content hub.
-
Locate
XBOWin the list of available solutions. -
Select the
XBOWrow to display detailed information about the solution in a side panel.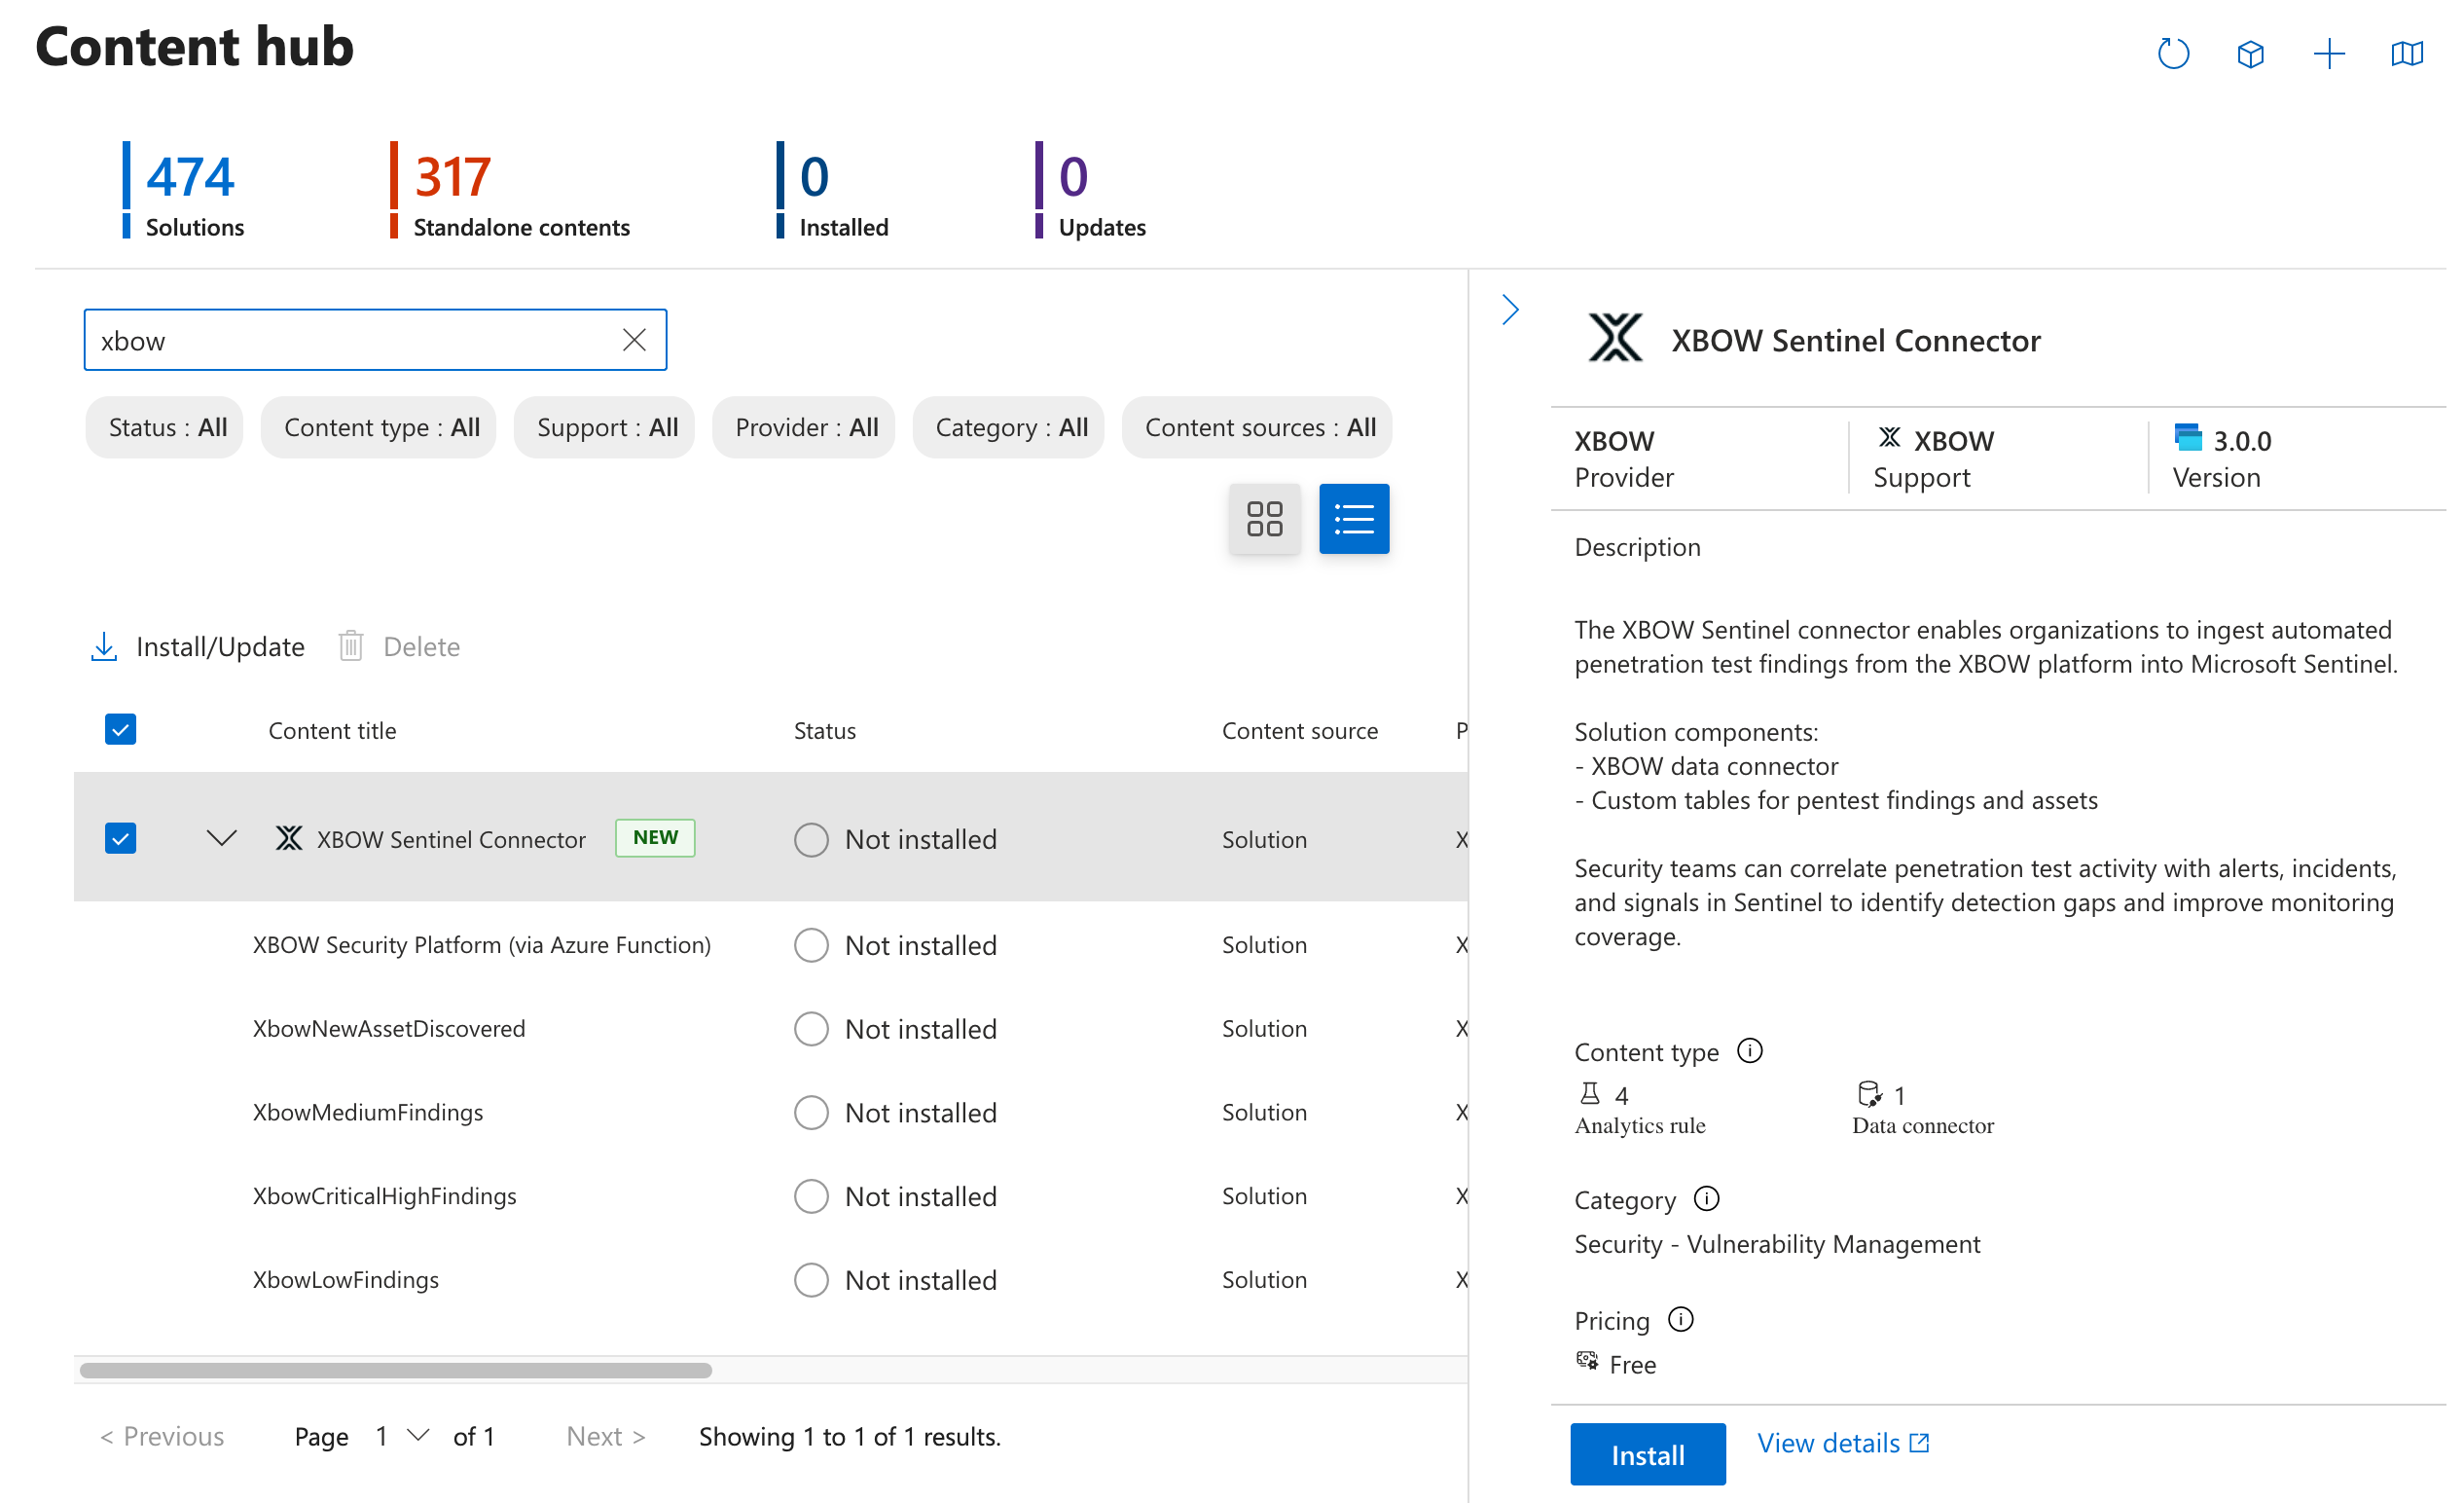
-
At the bottom of the side panel, click Install to install the solution.
When installation is complete, your workspace includes:
- A data connector to import and ingest data from XBOW
- XBOW Security Platform (via Azure Function)
- Four rule templates to generate alerts for XBOW data:
- XbowNewAssetDiscovered
- XbowMediumFindings
- XbowCriticalHighFindings
- XbowLowFindings
Prepare to deploy the data connector
Before deploying the data connector, you need to create authentication secrets in both products and register an application in Active Directory. The steps below guide you through generating the values required to set up secure communication between XBOW and Microsoft.
| Deployment field | Description | See |
|---|---|---|
| Workspace Name | Name of your Log Analytics / Microsoft Sentinel workspace | Task 4 |
| Xbow Api Token | XBOW Personal Access Token | Task 1 |
| Xbow Org Id | XBOW Organization ID | Task 1 |
| Tenant Id | Azure Active Directory Tenant ID | Task 2 |
| Client Id | App Registration Client ID | Task 2 |
| Client Secret | App Registration Client Secret | Task 3 |
| App Insights Workspace Resource ID | Full Resource ID of the Log Analytics workspace | Task 4 |
To store secrets and other information in an Azure Key Vault, see Use Key Vault references as app settings in Azure App Service, Azure Functions, and Azure Logic Apps in Microsoft Learn.
Task 1: XBOW data...
1. Generate an XBOW API token
You need an enterprise user account with administrator access to generate an API token.
- Open XBOW Console at: https://console.xbow.com/, unless you have data residency.
- Copy your organization identifier (ID) from the browser URL. The URL has the form
https://console.xbow.com/v2/organizations/ORG-ID/assets. You will need this ID later. - Generate an XBOW API token, see Generate an API key in the API reference.
- Store the value of the token securely. It will not be displayed again.
Data to record:
- XBOW API token: Xbow Api Token
- XBOW organization ID: Xbow Org Id
Task 2: Function application...
2. Create and register an application in Active Directory
The new application will provide secure authentication between the XBOW data connector and Microsoft Sentinel.
The option to register a new application, New registration, is available from the Azure Portal or the Microsoft Entra admin center.
- Click New registration to display the “Register an application” page.
- Type a name for the application, for example:
Xbow-Sentinel-Connector. - Leave the “Supported account types” field set to “Single tenant only”.
- Click Register to register a new application.
Data to record:
- Directory (tenant) ID: Tenant Id
- Application (client) ID: Client Id
Task 3: Application secret...
3. Create a client secret for your application
You can see a list of applications you own on the Azure Portal or the Microsoft Entra admin center.
- If necessary, open the application you created earlier.
- In the “Essentials” area, next to “Client credentials”, click Add a certificate or secret to create a token for authentication with the XBOW data connector.
- Define a description and expiry period, and click Add to create the secret.
- Store the Value of the client secret securely. It will not be displayed again.
Data to record:
- Value of the client secret: Client Secret
Task 4: Log Analytics workspace...
4. Get details of the Log Analytics workspace for XBOW data
You can see a list of all your Log Analytics workspaces in Azure Portal on the Log Analytics workspaces page.
- Click the name of the workspace that you want to connect to XBOW.
- In the “Essentials” area, make a note of the “Workspace Name”.
- Click the JSON View link to display the resource JSON for the workspace.
- Copy the value of the “Resource ID” shown at the top of the page.
Data to record:
- Log Analytics workspace name: Workspace Name
- Log Analytics workspace resource ID: App Insights Workspace Resource ID
Deploy the XBOW data connector
-
Open the XBOW Security Platform (via Azure Function) data connector: https://aka.ms/sentinel-Xbow-azuredeploy.
Alternatively, locate the XBOW Sentinel Connector solution in the Microsoft Defender Content hub, click XBOW Security Platform (via Azure Function) to display details for the data connector, then click Open connector page.
-
Click Deploy to Azure.
-
Enter the data you collected in the preparation section in the relevant fields.
-
Optionally, edit the Function App Location field to define the Azure region for the application resources.
-
Click Review + create to validate the data and view the terms.
-
Click Create to deploy the data connector.
If you see any errors during the deployment process, check all input fields and try redeploying the connector.
Deploying the connector automatically sets up:
- Data Collection Endpoint
- Data Collection Rule (DCR)
- Function App
- Tables in the Log Analytics workspace for the XBOW Console data
Allow the Data Collection Rule to publish metrics
The final task is to assign the “Monitoring Metrics Publisher” role to the new Data Collection Rule (DCR). This enables the rule to generate Microsoft Insights for the incoming data from XBOW Console. For example, this allows the DCR to generate alerts for newly identified critical vulnerabilities.
You can access the new DCR from deployment outputs or by opening the resource group from your Log Analytics workspaces overview.
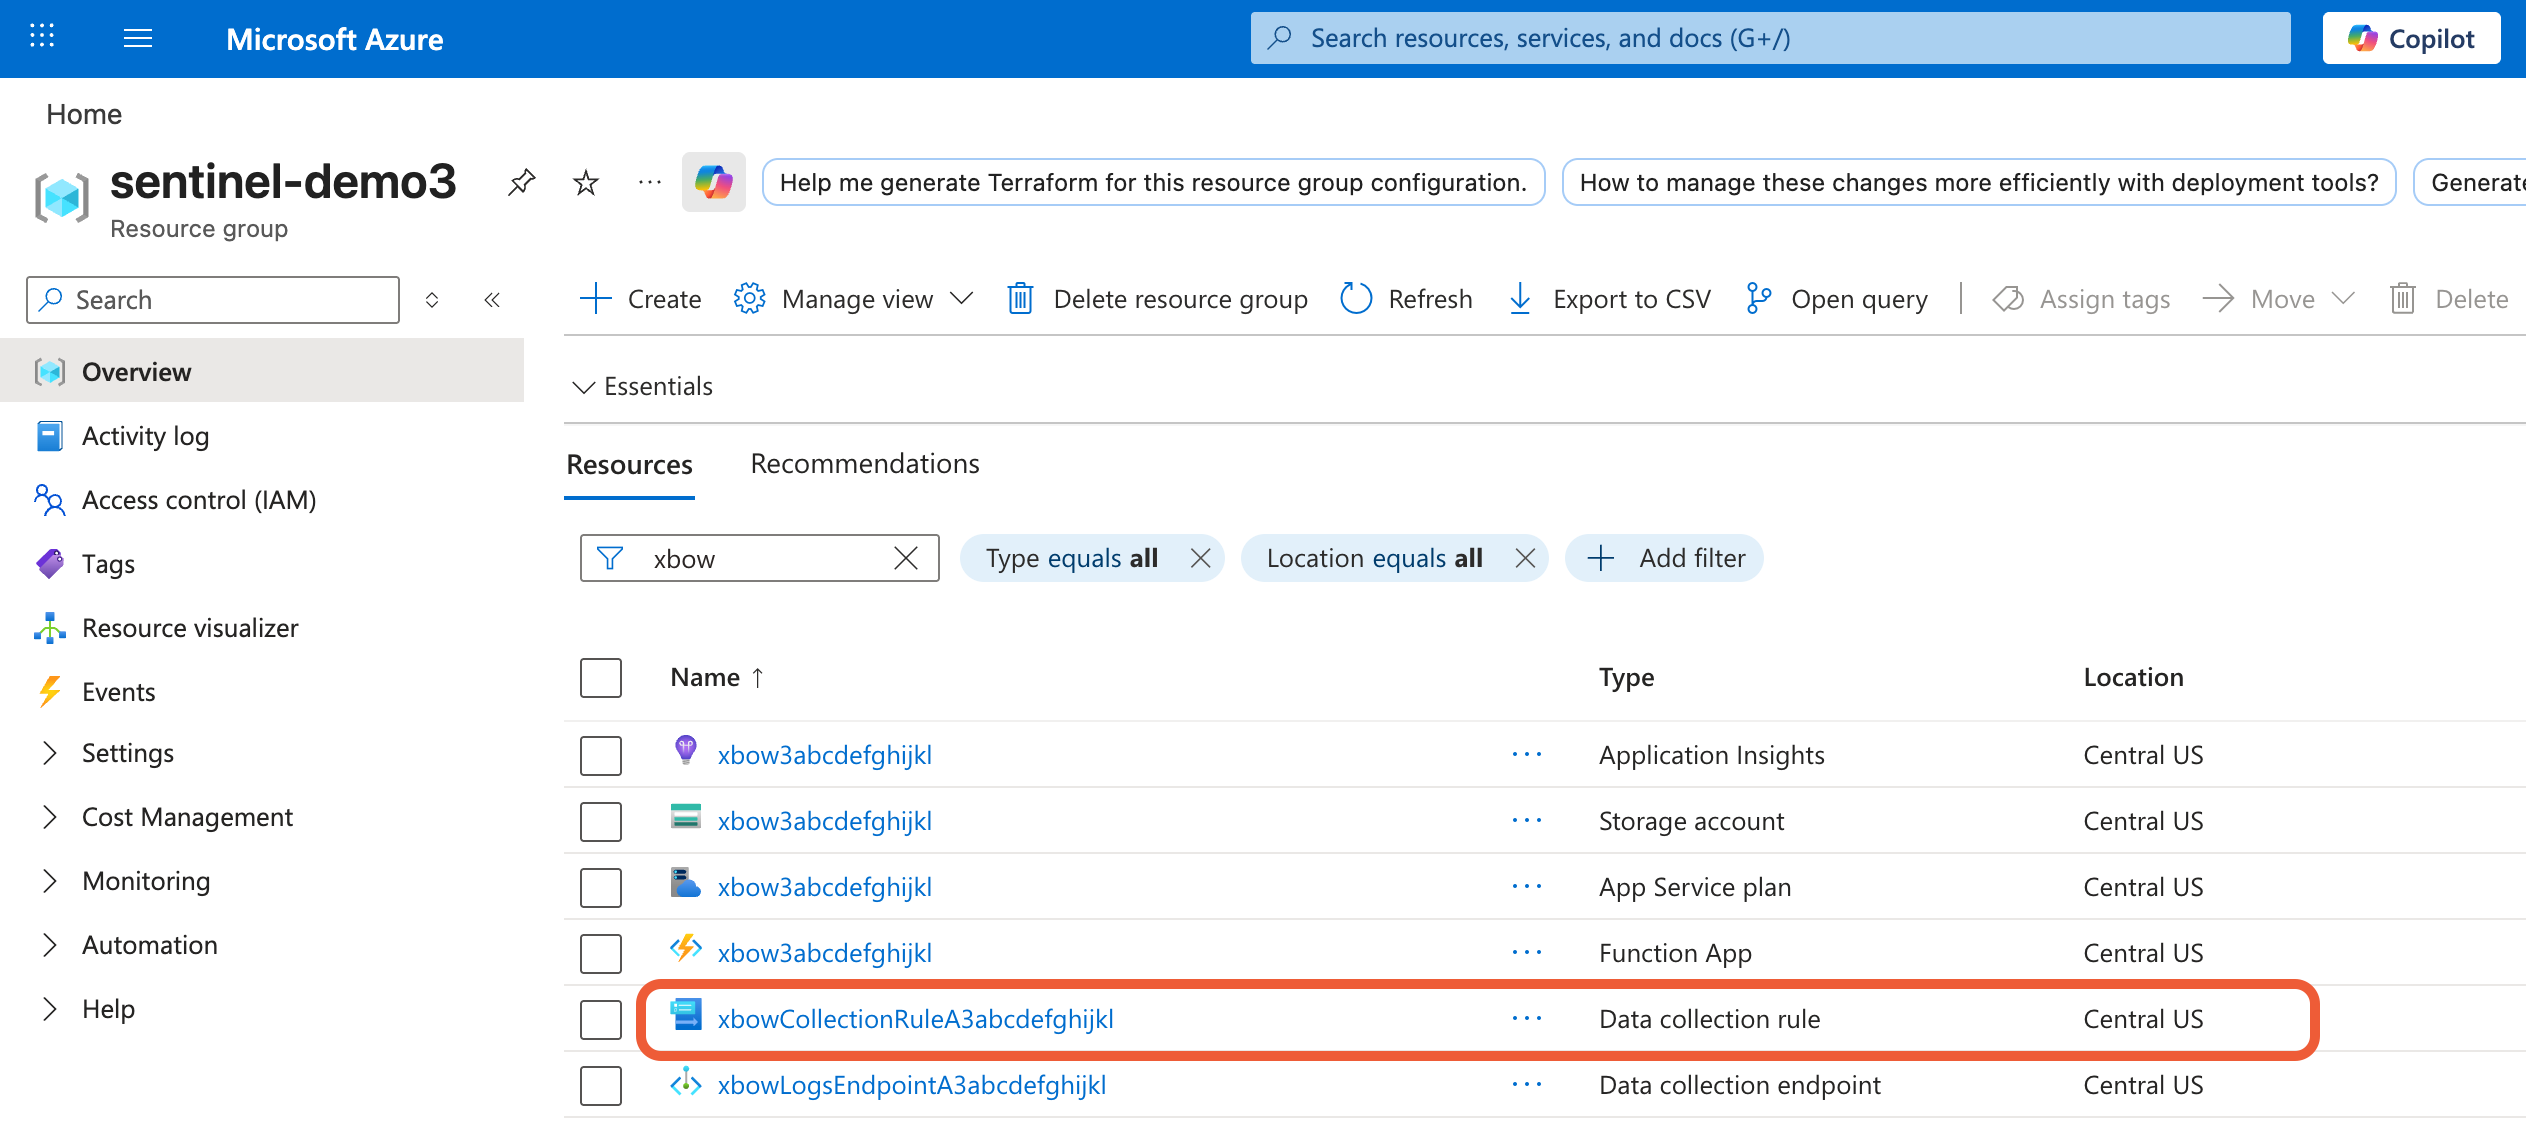
- Open the newly deployed DCR.
- In the sidebar, click Access control (IAM).
- In the access area, expand Add and select Add role assignment.
- Select the role Monitoring Metrics Publisher.
- Assign access to the App Registration (service principal) for the application you registered for XBOW to use, see 2. Create and register an application in Active Directory.
Wait a few minutes for the role to propagate through Azure before you check that XBOW data is being ingested as expected.
Check that the data connector is working
The connector checks for new XBOW data every 5 minutes, so you should see tables to hold XBOW data in your Log Analytics workspace after about 5 minutes.
If you have previously run assessments in XBOW Console, data for those assessments should be available in the tables. Otherwise the tables will be empty.
Tables for XBOW data
- XbowFindings_CL: One row for each security vulnerability discovered by XBOW with full details including severity, impact, mitigations, and steps to reproduce.
- XbowAssessments_CL: A list of each pentest assessment run and their current state. The table includes all runs whether they were started from XBOW Console, Microsoft Security Copilot, or the XBOW Public API.
- XbowAssets_CL: An asset inventory of target applications configured for assessment in XBOW Console.
Create rules to generate alerts
Once you have tables for XBOW data in your Log Analytics workspace, you can create analytics rules from the XBOW templates.
- In Microsoft Defender, expand Microsoft Sentinel > Configuration and click Analytics.
- You will see four rule templates with an
Xbowprefix. Click the ellipsis icon and then Create rule for the template you want to use. - Review the rule details then click Next: Set rule logic.
- Continue through the screens to define your rule and then save the rule.