Set up single sign-on authentication
- Public preview
- Enterprise only
Configure XBOW to manage single sign-on (SSO) authentication using your identity provider (IdP).
-
Centralize authentication in your IdP, so users do not need a separate XBOW password.
-
Delegate multi-factor authentication and session policies to your IdP.
-
Automatically assign XBOW roles based on IdP groups, using just-in-time (JIT) provisioning. . See Provision users automatically.
-
Optionally automate user provisioning and deprovisioning with SCIM. See Provision users automatically.
How it works
Each XBOW organization uses its own SAML 2.0 app or OIDC connection in your IdP, with its own Entity ID and ACS URL (SAML) or OIDC callback URL (OIDC). If you have multiple XBOW organizations, register a separate app or connection for each one.
Your IdP is shared across your XBOW organizations, so you can manage users centrally from your IdP.
When a user wants to log in to XBOW Console, they enter their email address and click Sign in with SSO.
- XBOW redirects the user to your IdP.
- The user authenticates with the IdP as usual, including MFA if enforced.
- The IdP sends the authentication response to XBOW.
- XBOW validates the response and creates a session for the user with access to your organization.
Prerequisites
-
An IdP that supports either SAML 2.0 or OIDC protocol. For example:
- SAML 2.0 is supported by Azure AD, Google Workspace, Okta, PingIdentity, and other enterprise providers.
- OIDC is supported by Auth0, Okta, and other OAuth 2.0 providers.
-
Access to create your XBOW organization as an application in your IdP.
-
An XBOW account with the Administrator or Existing Asset Administrator role.
You can start configuring SSO in either system:
- Start in XBOW to generate the service provider URLs.
- Start in your IdP if you have already created an XBOW application there, then transfer those values into the XBOW SSO configuration.
Create an SSO configuration in XBOW
-
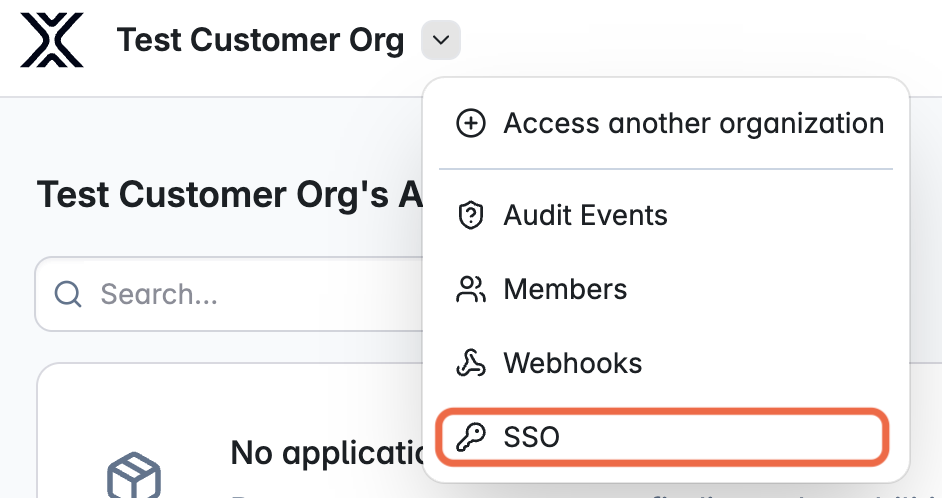
Open the XBOW administration menu and select SSO.
-
In the “Protocol” section, select SAML or OIDC according to the protocol your IdP supports. The “Protocol” section closes and the configuration options for the chosen protocol are displayed.
-
How you proceed depends on whether you have already created an XBOW app in your IdP:
-
Use data from an existing IdP app: Enter the values from the IdP in the fields displayed, then click Save configuration. Skip the remaining steps and go to Finish configuring SSO in XBOW to test and enable the connection.
-
Generate data for a new IdP app: Continue with the steps below to generate the values you will need when creating the IdP app.
-
-
Review the configuration options for the chosen protocol. For SAML, if needed, expand “Advanced Settings” to configure additional authentication details.
-
Click Save configuration to save your partly defined SSO configuration in XBOW.
-
For SAML protocol, click Generate certificate to generate a service provider certificate. If you want to use an existing certificate, dismiss this section.
-
The “Service Provider Setup” section is shown with the data you need for your IdP application.
Provider Fields SAML ACS URL (Assertion Consumer Service)
Entity ID / Issuer
Service Provider (SP) Certificate (PEM) — optionalOIDC OIDC Callback URL -
Copy or download the values.
Create an XBOW app in your IdP
- Log in to your IdP.
- Create a new application for your XBOW organization using either SAML 2.0 or OIDC. Consult the documentation for your IdP, for example: Add an Okta SAML application.
Add XBOW data for the SAML protocol
-
In the new XBOW application, enter the values you generated in the XBOW SSO configuration.
- ACS URL (Assertion Consumer Service)
- Entity ID / Issuer
-
Upload the same Service Provider (SP) Certificate (PEM) to both XBOW and your IdP application.
- If you generated a certificate in XBOW, add that PEM to the new XBOW application.
- Otherwise, generate a PEM certificate in your IdP, then copy or download it. You will paste this into XBOW in the next section.
-
Return to XBOW to complete setting up SSO. See Finish configuring SSO.
Add XBOW data for the OIDC protocol
- In the new XBOW application, enter the OIDC Callback URL generated by the XBOW SSO configuration.
- Copy the values for Client ID, Client Secret, and Domain. You will paste these into XBOW in the next section.
- Return to XBOW to complete setting up SSO. See Finish configuring SSO.
Finish configuring SSO in XBOW
- Return to XBOW and open your SSO configuration.
- Enter any additional data from your IdP, for example, an SP certificate or client ID and secret.
- Click Test login to test the configuration.
XBOW opens a new window and redirects you to your IdP. If you authenticate successfully, XBOW displays a success page and the window closes automatically. If the test fails an error page is displayed.
Troubleshoot authentication failures
| Error message | Suspected problem | Action needed |
|---|---|---|
Email domain mismatch |
The email address returned by the IdP belongs to a different domain than the one configured on the SSO connection. This usually indicates an attribute-mapping issue on the IdP, or that a user from outside the expected domain has been granted access to the IdP application. | Check the email domain returned by the IdP matches the domain configured for the SSO connection in XBOW. |
Invalid signature |
The SAML assertion's signature could not be verified against the certificate configured in XBOW. Most often caused by a certificate rotation on the IdP side that has not yet been mirrored in the XBOW SSO configuration. | Check the Service Provider (SP) certificate in XBOW matches the certificate used by the IdP. |
No profile sent from ID Provider |
The SAML response from the IdP was successfully validated but did not contain a user profile / attribute statement. The IdP application may be misconfigured to omit the subject or attribute release rules. | Check the IdP is configured to return user attributes, including email addresses. |
No email returned by IdP |
The OIDC userinfo response (or SAML profile) was returned successfully but did not include an email claim. The IdP application's scopes or attribute mappings may not be releasing the email field. | Check the SAML assertion or OIDC claim includes an email address. |
State mismatch - possible CSRF |
The state parameter returned by the IdP on the OIDC callback does not match the value stored in the login cookie. Usually caused by a stale browser tab, cookies being cleared or blocked mid-flow, or a genuine CSRF attempt. |
Retry the login. Persistent errors can indicate a cookie or browser issue. |
Incorrect provider for email domain |
The user's email domain is registered with a different SSO provider in XBOW than the one they are currently authenticating through. The user has likely started the login flow from the wrong provider's URL. | Check that your email domain is mapped to this SSO configuration. |
No account found for this email address |
The user was invited under a different email, their account was removed/deactivated, or the SAML attribute mapping for email returns a different value than what's stored in XBOW. | For a one-off problem, invite the user to the organization manually using the email address the IdP will return in the SAML assertion's NameID. See also Provision users automatically. |
Enforce SSO
When you have successfully tested SSO, you are ready to enable and enforce it for users.
Turn on Enforce SSO to require all users in your organization to authenticate through your IdP. While this toggle is off, SSO is configured but not active, and users continue to sign in with their existing method.
What happens after you enable SSO
If you do not configure SCIM, XBOW provisions users the first time they sign in through SSO. XBOW matches the groups in the IdP response against any just-in-time role mapping rules for your organization and assigns the mapped role to the user. See Provision users automatically.
If the user’s groups do not match a rule and a default role is not set, they cannot access the organization. An administrator must add a matching rule or create the user manually to grant access.